ComfyUI is a powerful tool for generating AI images, and with Fal.ai, we can use it in the browser. We only pay when we run the workflow, and not while we are preparing the workflow.
When you create a new workflow in Fal.ai, you’ll be given a basic template with nodes to create an image using SDXL. For this example, we’ll add a single LoRA node.
Adding a LoRA (Style) to Your Image
A LoRA (Local Rank Adapter) is a way to add a specific style to your image. In this case, we’ll add the Stickers.Redmond LoRA. To do this, we need to find the trigger words required to activate the effect. You can search for the LoRA on Civitai, a website that hosts many models. Once you find the matching LoRA page, you’ll see the trigger words needed. In this case the trigger words are “stickers” and “sticker”.
To add the LoRA to your workflow, follow these steps:
- Right-click and select “Add Node” > “loaders” > “Load LoRA”.
- Set the “lora_name” field to StickersRedmond.safetensors.
- Rewire the model and clip to go through this new node, placing it after the “Load Checkpoint” node.
- The settings in the KSampler are also important, you can copy these from the Civitai page also.
- Set the Empty Latent Image size to 1024 x 1024.
- Right click on the CLIP Text Encode and set as a Fal input
- Right click on the KSampler and set the seed as a Fal input
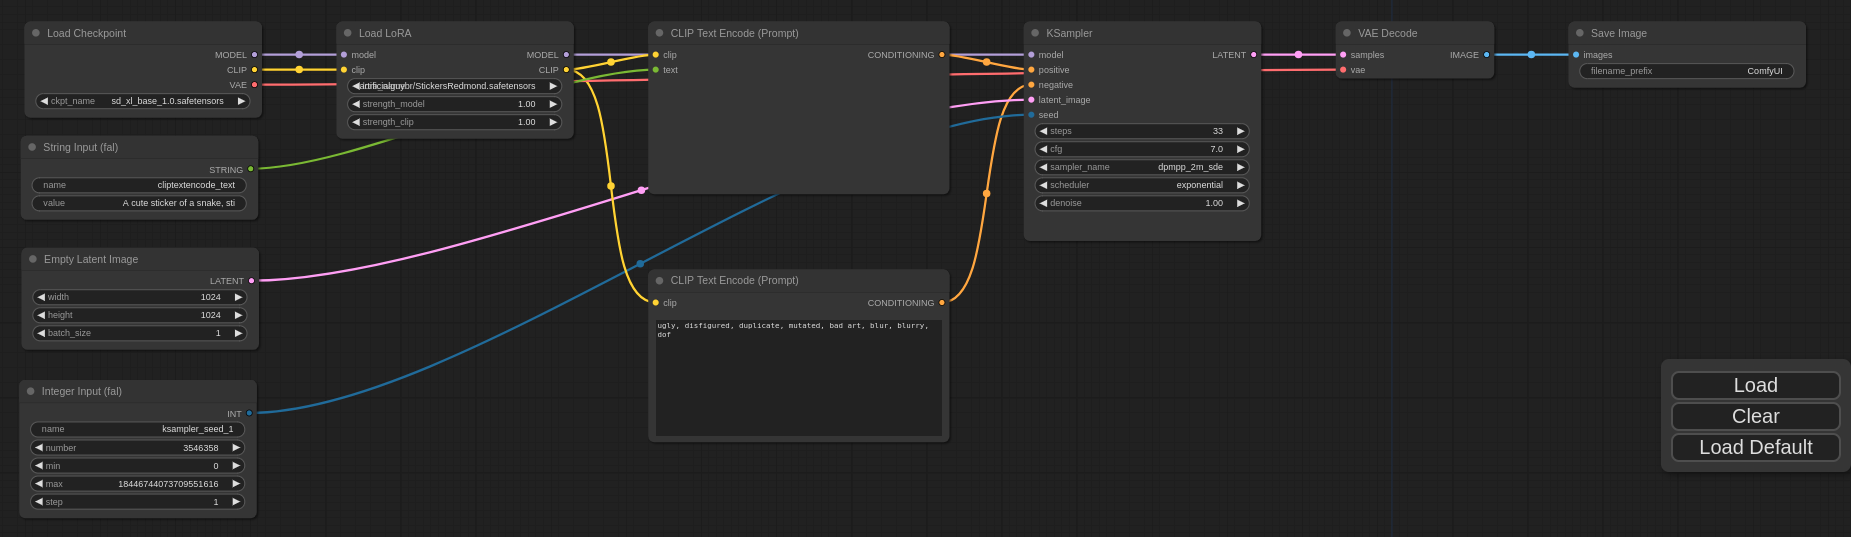
Here is what my full workflow looks like:
Running the Workflow
In Fal click “Update” and then run the workflow from the “Playground” tab. You’re now ready to see your image generated with the Sticker style!
The cool thing is an image created by ComfyUI includes the metadata of the workflow in the image. So you can drag’n’drop the image into ComfyUI. Try it with the image below:

By following these steps, you should be able to get started with ComfyUI in the cloud and add a LoRA to your image. Happy generating!